这个教程将帮助你在骁龙设备安装GNU/Linux。
作者使用的是一加6T (sdm845)
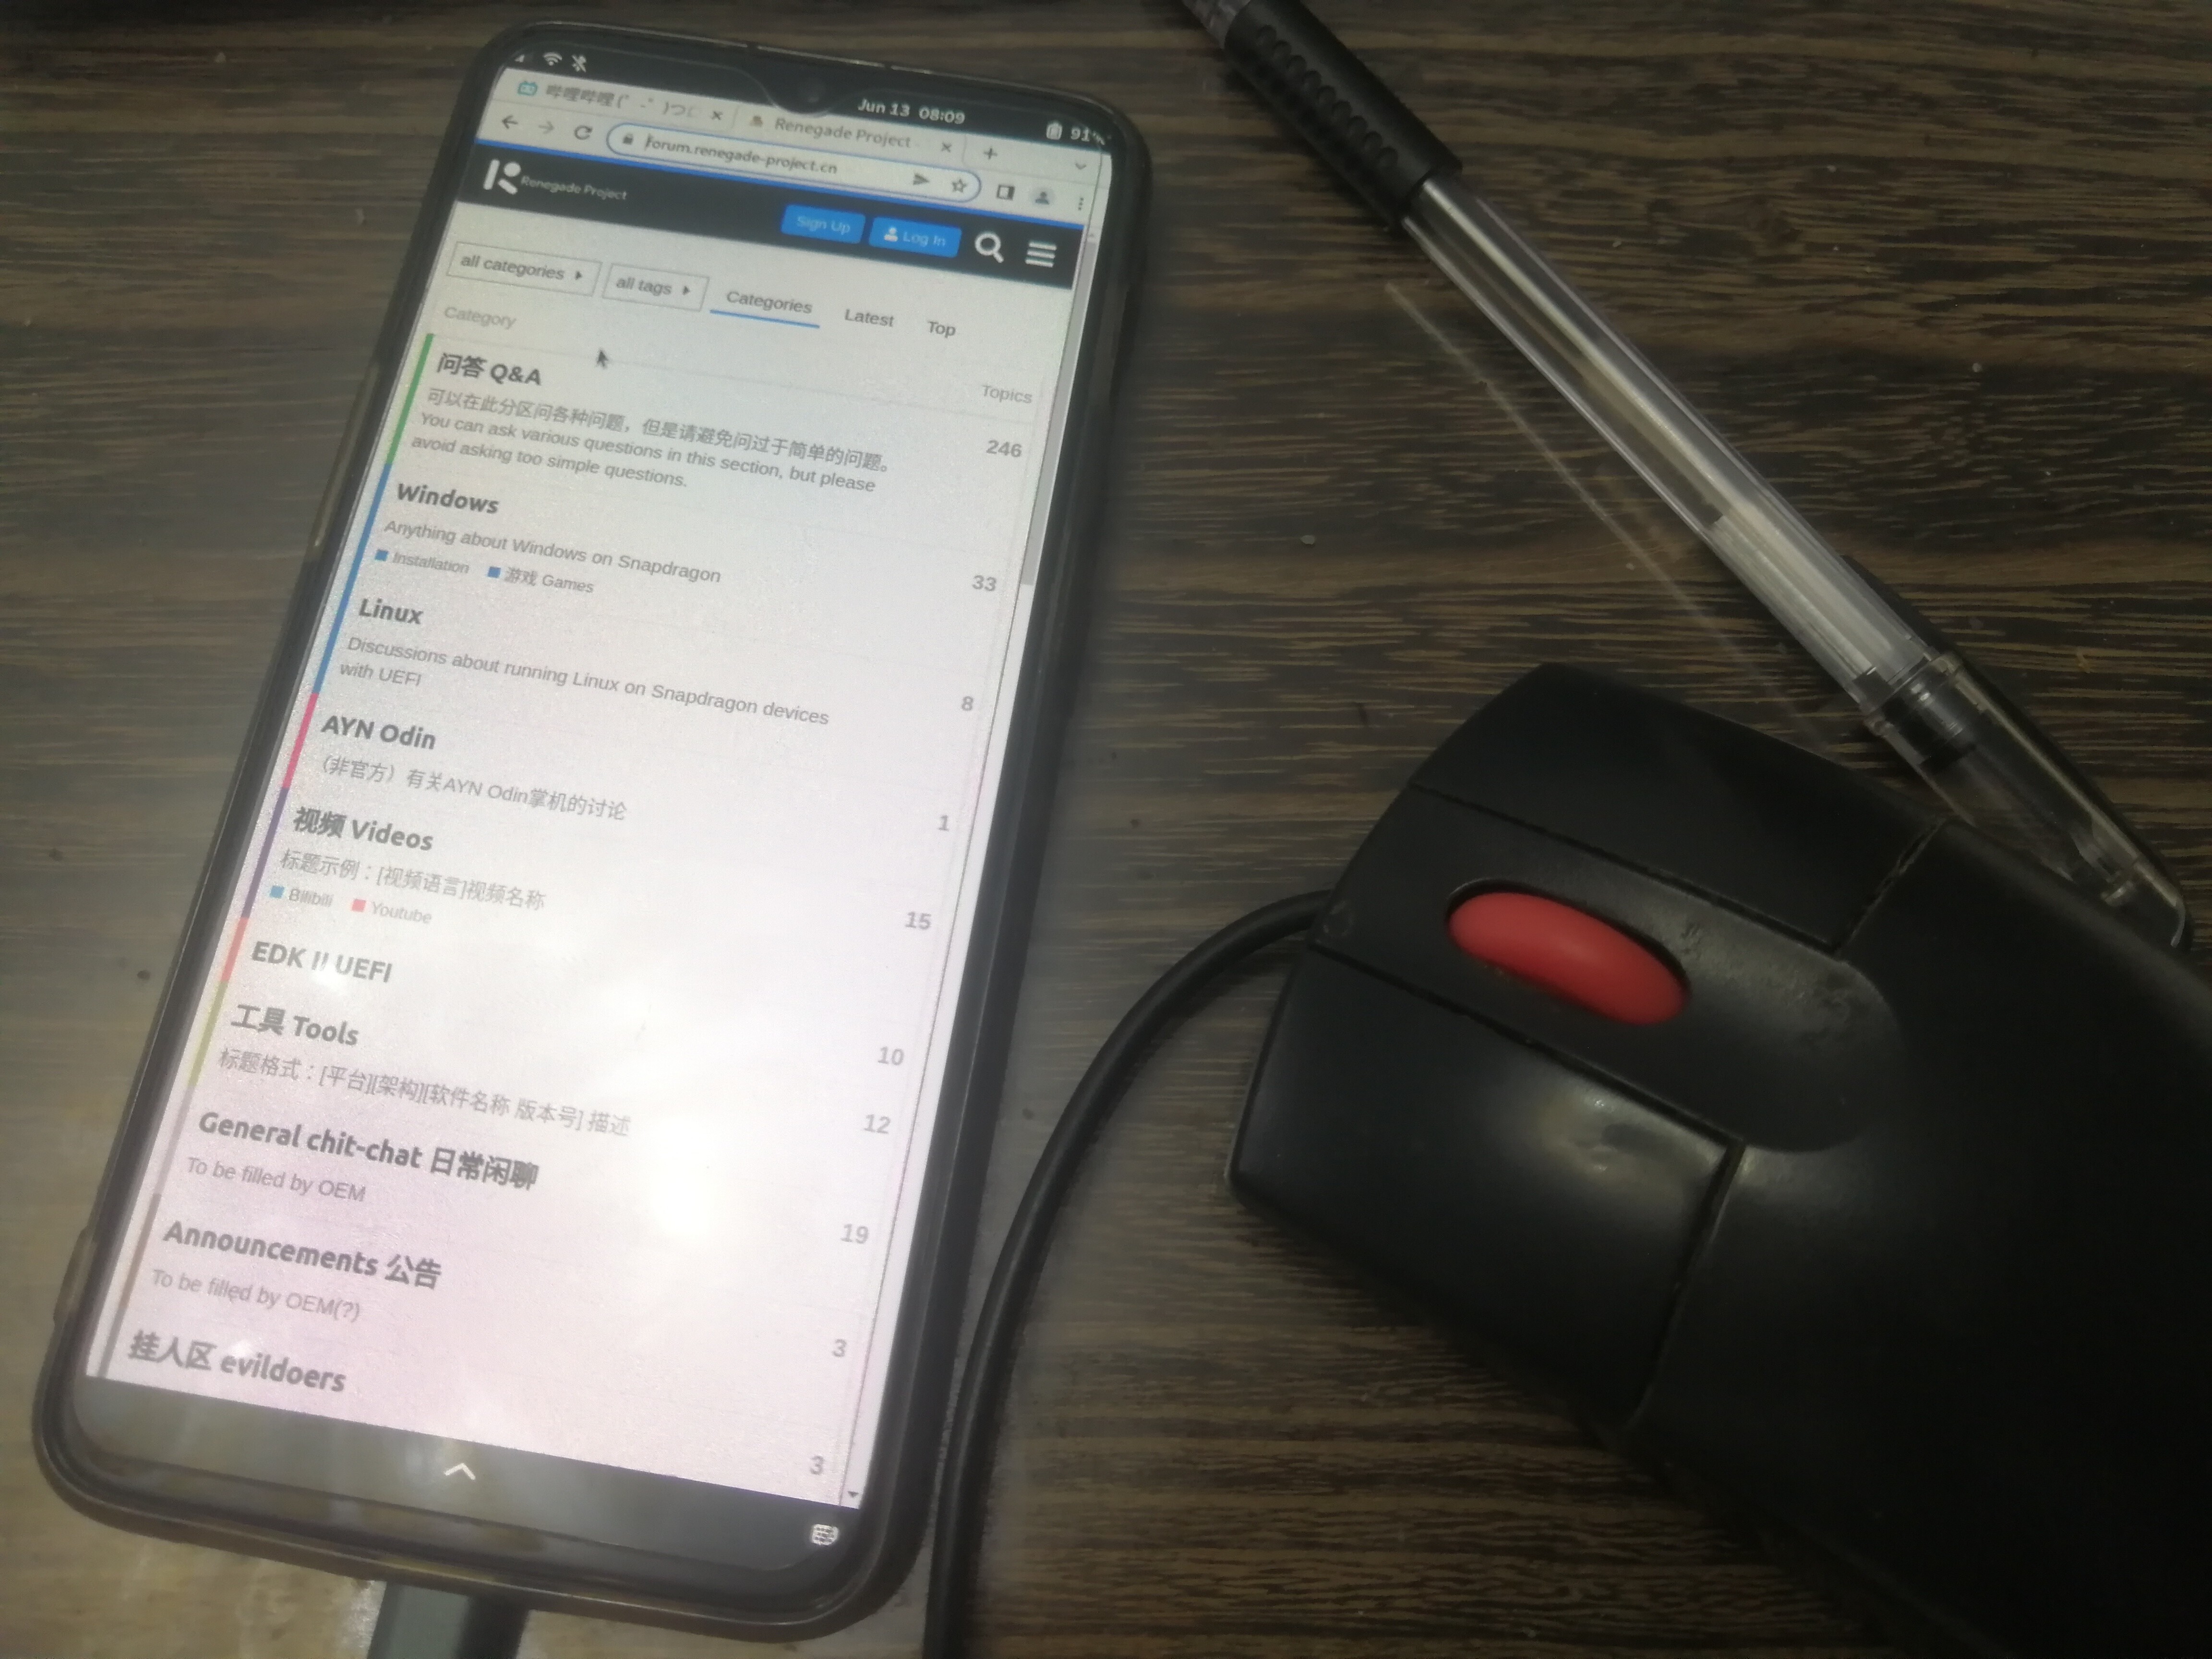
欢迎进QQ群交流(550920309/582280627)
![]() 其他CPU/机型建议先浏览本教程
其他CPU/机型建议先浏览本教程7.see also模块
提示:这个教程打开了Wiki功能,欢迎有想法的人前来编辑,并在其他贡献者一栏署上名,谢谢大家!
编写者:@snnbyyds
其他贡献者:@BigfootACA @skr-niao @Redstoneeeeeee @lcyf9102s 等
备注:部分内容尚待补充
以 ** 一加6T ** 为例
@skr-niao 的一加6T的成品(Manjaro):Releases · silime/plasma-mobile · GitHub
对于mix3: How to Install Arch Linux on Xiaomi Mi MIX 3 (based on EDK2) (xperseus.dev)
效果:
1 编译内核
sdm845成品:
Releases · silime/kernel-builder (github.com)
来自 @skr-niao
1.1 安装相关依赖
对于Ubuntu 22.04 LTS:
sudo apt install build-essential openssl pkg-config libssl-dev libncurses5-dev pkg-config minizip libelf-dev flex bison  libc6-dev libidn11-dev rsync bc liblz4-tool
sudo apt install gcc-aarch64-linux-gnu dpkg-dev dpkg git
1.2 克隆内核源码
你可以在“-b”参数后选择其他分支
注:带有mi 8(dipper)支持的内核源码https://gitlab.com/mainline-xiaomi-dipper/linux
mkdir ~/workspace
cd ~/workspace
git clone --depth=1 https://gitlab.com/sdm845-mainline/linux.git -b sdm845/5.18-release

# note: for mi 8
# git clone --depth=1 https://gitlab.com/mainline-xiaomi-dipper/linux.git -b 5.18-xiaomi-dipper
可用分支可在gitlab网页查看

1.3 为一加6T添加tfa98xx驱动(弃用)
备注:在内核源码( Files · sdm845/5.19-release · Qualcomm Snapdragon 845 Mainline / Linux · GitLab)中,已经加入了来自下游的tfa98xx驱动,不需要额外手动添加,如果你使用较新的分支,请跳过此步骤
详见:
ASoC: codecs: add support for TFA98xx based on downstream (bc7a7e04) · Commits · Qualcomm Snapdragon 845 Mainline / Linux · GitLab
摘要
一加6T的音频codec为tfa9894, 需要额外添加内核模块
1.3.1 添加源码
(修改自https://github.com/J0SH1X/tfa98xx)
下载:
https://stor.classfun.cn:4443/s/xPCE
解压,将其中的inc和src文件夹复制到linux/sound/soc/codecs下
1.3.2 修改Makefile和Kconfig
cd ~/workspace/linux/sound/soc/codecs
1.3.2.1 修改Makefile
nano Makefile
作如下修改
也可以直接打patch
打patch
cd ~/workspace/linux/
git apply --reject xxx.patch
diff --git a/sound/soc/codecs/Makefile b/sound/soc/codecs/Makefile
index fbd409148efb..2a8294abbd8b 100644
--- a/sound/soc/codecs/Makefile
+++ b/sound/soc/codecs/Makefile
@@ -244,6 +244,10 @@ snd-soc-tda7419-objs := tda7419.o
 snd-soc-tas2770-objs := tas2770.o
 snd-soc-tfa9879-objs := tfa9879.o
 snd-soc-tfa989x-objs := tfa989x.o
+snd-soc-tfa98xx-objs += src/tfa98xx.o
+snd-soc-tfa98xx-objs += src/tfa_container.o
+snd-soc-tfa98xx-objs += src/tfa_dsp.o
+snd-soc-tfa98xx-objs += src/tfa_init.o
 snd-soc-tlv320adc3xxx-objs := tlv320adc3xxx.o
 snd-soc-tlv320aic23-objs := tlv320aic23.o
 snd-soc-tlv320aic23-i2c-objs := tlv320aic23-i2c.o
@@ -587,6 +591,7 @@ obj-$(CONFIG_SND_SOC_TAS6424)       += snd-soc-tas6424.o
 obj-$(CONFIG_SND_SOC_TDA7419)  += snd-soc-tda7419.o
 obj-$(CONFIG_SND_SOC_TAS2770) += snd-soc-tas2770.o
 obj-$(CONFIG_SND_SOC_TFA9879)  += snd-soc-tfa9879.o
+obj-$(CONFIG_SND_SOC_TFA98XX) += snd-soc-tfa98xx.o
 obj-$(CONFIG_SND_SOC_TFA989X)  += snd-soc-tfa989x.o
 obj-$(CONFIG_SND_SOC_TLV320ADC3XXX)    += snd-soc-tlv320adc3xxx.o
 obj-$(CONFIG_SND_SOC_TLV320AIC23)      += snd-soc-tlv320aic23.o
1.3.2.2 修改Kconfig
nano Kconfig
打patch
cd ~/workspace/linux/
git apply --reject xxx.patch
作如下修改
diff --git a/sound/soc/codecs/Kconfig b/sound/soc/codecs/Kconfig
index edc090b38afb..39693c63a325 100644
--- a/sound/soc/codecs/Kconfig
+++ b/sound/soc/codecs/Kconfig
@@ -222,6 +222,7 @@ config SND_SOC_ALL_CODECS
        imply SND_SOC_TDA7419
        imply SND_SOC_TFA9879
        imply SND_SOC_TFA989X
+       imply SND_SOC_TFA98xx
        imply SND_SOC_TLV320ADC3XXX
        imply SND_SOC_TLV320ADCX140
        imply SND_SOC_TLV320AIC23_I2C
@@ -1534,6 +1535,16 @@ config SND_SOC_TFA989X
          Note that the driver currently bypasses the built-in "CoolFlux DSP"
          and does not support (hardware) volume control.

+config SND_SOC_TFA98XX
+        tristate "NXP/Goodix TFA98XX (TFA1) amplifiers"
+        depends on I2C
+        select REGMAP_I2C
+        help
+          Enable support for NXP (now Goodix) TFA98XX (TFA1 family) speaker
+          amplifiers, e.g. TFA98XX.
+          Note that the driver currently bypasses the built-in "CoolFlux DSP"
+          and does not support (hardware) volume control.
+
 config SND_SOC_TLV320ADC3XXX
        tristate "Texas Instruments TLV320ADC3001/3101 audio ADC"
        depends on I2C
1.4 生成 .config
make ARCH=arm64 defconfig sdm845.config
# generate .config
1.5 进行编译
make ARCH=arm64 CROSS_COMPILE=aarch64-linux-gnu- -j$(nproc)
生成deb包供Debian系得GNU/Linux使用
make -j$(nproc) ARCH=arm64 KBUILD_DEBARCH=arm64 KDEB_CHANGELOG_DIST=mobile CROSS_COMPILE=aarch64-linux-gnu- deb-pkg
# This will generate several deb files in ../

2 制作rootfs
2.1 下载
对于Archlinux,从http://os.archlinuxarm.org/os/ArchLinuxARM-aarch64-latest.tar.gz下载
cd ~/workspace
wget http://os.archlinuxarm.org/os/ArchLinuxARM-aarch64-latest.tar.gz
对于Ubuntu,从 Index of /ubuntu-base选择自己想要的版本
2.2 制作
2.2.1 进入chroot
sudo apt install qemu-user-static
dd if=/dev/zero of=archlinux.img bs=1G count=6
mkfs.ext4 archlinux.img
mkdir arch
sudo mount archlinux.img arch
cd arch
sudo tar -xpvf ../ArchLinuxARM-aarch64-latest.tar.gz
cd ..
sudo mount --bind /dev arch/dev
sudo mount -t devpts devpts arch/dev/pts -o gid=5,mode=620
sudo mount -t proc proc arch/proc
sudo mount -t sysfs sysfs arch/sys
sudo mount -t tmpfs tmpfs arch/run

sudo rm -rf arch/etc/resolv.conf && sudo cp /etc/resolv.conf arch/etc/

sudo chroot arch
2.2.2 初始化pacman keyring
pacman-key --init
pacman-key --populate archlinuxarm
2.2.3 换源(可选)
详见 archlinuxarm | 镜像站使用帮助 | 清华大学开源软件镜像站 | Tsinghua Open Source Mirror
pacman -Syyu
# upgrade
2.2.4 卸载旧的内核和firmware
pacman -Q | grep -i linux
pacman -R linux-aarch64 linux-firmware linux-firmware-whence
exit
# exit chroot environment
2.2.5 安装新的内核和firmware
先退出chroot环境
然后:
cd ~/workspace/linux
sudo make ARCH=arm64 CROSS_COMPILE=aarch64-linux-gnu-  INSTALL_MOD_PATH=~/workspace/arch modules_install
sudo make ARCH=arm64 INSTALL_PATH=~/workspace/arch/boot install
如果是debian系也可以直接用dpkg安装deb
下载为一加6和一加6T定制的firmware(来自mobian源和Debian源)( Index of /pool/non-free/f/ (mobian.org))( Index of /debian/pool/non-free/f/firmware-nonfree/ | 清华大学开源软件镜像站 | Tsinghua Open Source Mirror)
https://stor.classfun.cn:4443/s/0Nsa
对于其它设备,如果有PostmarketOS/Mobian支持,可以从中直接提取,如果没有,请自己准备
解压得到三个deb文件,复制进rootfs,虽然是arch,但也可以用dpkg安装firmware
![]() 警告
警告 ![]()
不要使用dpkg安装别的任何软件包!!!!切记切记!!
sudo cp -r *.deb ~/workspace/arch/root/
如果要启用一加6T的声音,下载(GitHub - J0SH1X/tfa98xx)中的 tfa98xx.cnt
复制入rootfs
sudo cp tfa98xx.cnt ~/workspace/arch/root/
重新进入chroot环境,安装firmware,生成initial ramdisk
详见 mkinitcpio - ArchWiki (archlinux.org)
sudo chroot ~/workspace/arch
cd ~
pacman -S dpkg
dpkg -i *.deb
mv ~/tfa98xx.cnt /usr/lib/firmware/
ldconfig
修改/etc/mkinitcpio.conf
nano /etc/mkinitcpio.conf
找到
# BINARIES
# This setting includes any additional binaries a given user may
# wish into the CPIO image.  This is run last, so it may be used to
# override the actual binaries included by a given hook
# BINARIES are dependency parsed, so you may safely ignore libraries
BINARIES=()
在BINARIES=()填入xxxx_zap.mbn/ipa_fws.mbn的路径
这两个固件的来源一般是手机提取并放在特殊的位置加载(具体由dts/dtsi指定)
对于fajita,改为:
BINARIES=(/usr/lib/firmware/qcom/sdm845/oneplus6/a630_zap.mbn /usr/lib/firmware/qcom/sdm845/oneplus6/ipa_fws.mbn)
ls /usr/lib/modules
# get kernel version
mkinitcpio --generate /boot/initrd.img-5.18.0-sdm845-00109-gf7ad1e5036bb-dirty --kernel 5.18.0-sdm845-00109-gf7ad1e5036bb-dirty
附固件结构示例(fajita)
展开
.
├── ath10k
│   ├── QCA4019
│   │   └── hw1.0
│   │       ├── board-2.bin
│   │       ├── firmware-5.bin
│   │       └── notice_ath10k_firmware-5.txt
│   ├── QCA6174
│   │   ├── hw2.1
│   │   │   ├── board-2.bin
│   │   │   ├── board.bin
│   │   │   ├── firmware-5.bin
│   │   │   └── notice_ath10k_firmware-5.txt
│   │   └── hw3.0
│   │       ├── board-2.bin
│   │       ├── board.bin
│   │       ├── firmware-4.bin
│   │       ├── firmware-6.bin
│   │       ├── firmware-sdio-6.bin
│   │       ├── notice_ath10k_firmware-4.txt
│   │       ├── notice_ath10k_firmware-6.txt
│   │       └── notice_ath10k_firmware-sdio-6.txt
│   ├── QCA9377
│   │   └── hw1.0
│   │       ├── board-2.bin
│   │       ├── board.bin
│   │       ├── firmware-5.bin
│   │       ├── firmware-6.bin
│   │       ├── firmware-sdio-5.bin
│   │       ├── notice_ath10k_firmware-5.txt
│   │       ├── notice_ath10k_firmware-6.txt
│   │       └── notice_ath10k_firmware-sdio-5.txt
│   ├── QCA9887
│   │   └── hw1.0
│   │       ├── board.bin
│   │       ├── firmware-5.bin
│   │       └── notice_ath10k_firmware-5.txt
│   ├── QCA9888
│   │   └── hw2.0
│   │       ├── board-2.bin
│   │       ├── firmware-5.bin
│   │       └── notice_ath10k_firmware-5.txt
│   ├── QCA988X
│   │   └── hw2.0
│   │       ├── board.bin
│   │       ├── firmware-4.bin
│   │       ├── firmware-5.bin
│   │       ├── notice_ath10k_firmware-4.txt
│   │       └── notice_ath10k_firmware-5.txt
│   ├── QCA9984
│   │   └── hw1.0
│   │       ├── board-2.bin
│   │       ├── firmware-5.bin
│   │       └── notice_ath10k_firmware-5.txt
│   ├── QCA99X0
│   │   └── hw2.0
│   │       ├── board-2.bin
│   │       ├── firmware-5.bin
│   │       └── notice_ath10k_firmware-5.txt
│   └── WCN3990
│       └── hw1.0
│           ├── board-2.bin
│           ├── firmware-5.bin
│           ├── notice.txt_wlanmdsp
│           └── wlanmdsp.mbn
├── postmarketos
│   ├── ath10k
│   │   └── WCN3990
│   │       └── hw1.0
│   │           └── board-2.bin
│   └── qca
│       └── crbtfw21.tlv
├── qca
│   └── oneplus6
│       └── crnv21.bin
├── qcom
│   ├── a300_pfp.fw
│   ├── a300_pm4.fw
│   ├── a330_pfp.fw
│   ├── a330_pm4.fw
│   ├── a420_pfp.fw
│   ├── a420_pm4.fw
│   ├── a530_pfp.fw
│   ├── a530_pm4.fw
│   ├── a530v3_gpmu.fw2
│   ├── a530_zap.b00
│   ├── a530_zap.b01
│   ├── a530_zap.b02
│   ├── a530_zap.mdt
│   ├── a630_gmu.bin
│   ├── a630_sqe.fw
│   ├── a650_gmu.bin
│   ├── a650_sqe.fw
│   ├── a660_gmu.bin
│   ├── a660_sqe.fw
│   ├── apq8096
│   │   ├── adsp.mbn
│   │   ├── adspr.jsn
│   │   ├── adspua.jsn
│   │   ├── mba.mbn
│   │   ├── modem.mbn
│   │   └── modemr.jsn
│   ├── leia_pfp_470.fw
│   ├── leia_pm4_470.fw
│   ├── sdm845
│   │   ├── a630_zap.mbn
│   │   ├── adsp.mbn
│   │   ├── adspr.jsn
│   │   ├── adspua.jsn
│   │   ├── cdsp.mbn
│   │   ├── cdspr.jsn
│   │   ├── mba.mbn
│   │   ├── modem.mbn
│   │   ├── modemuw.jsn
│   │   ├── oneplus6
│   │   │   ├── a630_zap.mbn
│   │   │   ├── adsp.mbn
│   │   │   ├── adspr.jsn
│   │   │   ├── adspua.jsn
│   │   │   ├── cdsp.mbn
│   │   │   ├── cdspr.jsn
│   │   │   ├── ipa_fws.mbn
│   │   │   ├── mba.mbn
│   │   │   ├── modem.mbn
│   │   │   ├── modemr.jsn
│   │   │   ├── modemuw.jsn
│   │   │   ├── slpir.jsn
│   │   │   ├── slpius.jsn
│   │   │   ├── venus.mbn
│   │   │   └── wlanmdsp.mbn
│   │   └── wlanmdsp.mbn -> ../../ath10k/WCN3990/hw1.0/wlanmdsp.mbn
│   ├── sm8250
│   │   ├── a650_zap.mbn
│   │   ├── adsp.mbn
│   │   ├── adspr.jsn
│   │   ├── adspua.jsn
│   │   ├── cdsp.mbn
│   │   └── cdspr.jsn
│   ├── venus-1.8
│   │   ├── venus.b00
│   │   ├── venus.b01
│   │   ├── venus.b02
│   │   ├── venus.b03
│   │   ├── venus.b04
│   │   └── venus.mdt
│   ├── venus-4.2
│   │   ├── venus.b00
│   │   ├── venus.b01
│   │   ├── venus.b02
│   │   ├── venus.b03
│   │   ├── venus.b04
│   │   └── venus.mdt
│   ├── venus-5.2
│   │   ├── venus.b00
│   │   ├── venus.b01
│   │   ├── venus.b02
│   │   ├── venus.b03
│   │   ├── venus.b04
│   │   ├── venus.mbn
│   │   └── venus.mdt
│   ├── venus-5.4
│   │   ├── venus.b00
│   │   ├── venus.b01
│   │   ├── venus.b02
│   │   ├── venus.b03
│   │   ├── venus.b04
│   │   ├── venus.mbn
│   │   └── venus.mdt
│   ├── vpu-1.0
│   │   ├── venus.b00
│   │   ├── venus.b01
│   │   ├── venus.b02
│   │   ├── venus.b03
│   │   ├── venus.b04
│   │   ├── venus.b05
│   │   ├── venus.b06
│   │   ├── venus.b07
│   │   ├── venus.b08
│   │   ├── venus.b09
│   │   ├── venus.b10
│   │   ├── venus.b19
│   │   ├── venus.mbn
│   │   └── venus.mdt
│   └── vpu-2.0
│       ├── venus.b00
│       ├── venus.b01
│       ├── venus.b02
│       ├── venus.b03
│       ├── venus.b04
│       ├── venus.b05
│       ├── venus.b06
│       ├── venus.b07
│       ├── venus.b08
│       ├── venus.b09
│       ├── venus.b10
│       ├── venus.b19
│       ├── venus.mbn
│       └── venus.mdt
├── regulatory.db
└── regulatory.db.p7s
2.2.6 安装软件包和基本配置
部分参考: Arch Linux 安装使用教程 - ArchTutorial - Arch Linux Studio
对于Archlinux:
2.2.6.1 设置时区
ln -sf /usr/share/zoneinfo/Asia/Shanghai /etc/localtime
# Shanghai
2.2.6.2 设置locale
参见 Locale - ArchWiki (archlinux.org)
nano /etc/locale.gen
# uncomment en_US.UTF-8 UTF-8
# uncomment zh_CN.UTF-8 UTF-8
locale-gen

2.2.6.3 自定义主机名
# For example
echo 'OnePlus6T' > /etc/hostname
2.2.6.4 alarm(Archlinuxarm内置非root用户)配置
更改alarm密码,并添加到wheel用户组
passwd alarm
# Change its password. Default is "alarm"

usermod -aG wheel alarm
添加sudo,设置sudo权限
pacman -S sudo
EDITOR=nano visudo
找到下面这样的一行,把前面的注释符号 # 去掉
#%wheel ALL=(ALL:ALL) ALL
2.2.6.5 必要软件包
pacman -S base base-devel dhcpcd iwd
pacman -S grub efibootmgr

pacman -S networkmanager modemmanager
pacman -S bluez bluez-utils pulseaudio-bluetooth
pacman -S qrtr rmtfs
systemctl enable NetworkManager bluetooth qrtr-ns rmtfs
systemctl enable ModemManager

pacman -S git wget
pacman -S ntfs-3g usbutils
安装pd-mapper 和 tqftpserv
注:默认的PKGBUILD有问题,需要手动修复,在这里不详细描述,如果嫌麻烦,也可以直接编译安装
直接编译安装(点击展开)
git clone https://hub.fastgit.org/andersson/pd-mapper.git
git clone https://hub.fastgit.org/andersson/tqftpserv.git

cd pd-mapper && make && make install && cd ..
cd tqftpserv && make && make install && cd ..

# clean
rm -rf tqftpserv pd-mapper
使用pkgbuild
#switch to alarm
su alarm
########
cd ~
# Compile and Install pd-mapper
git clone https://aur.archlinux.org/pd-mapper-git.git ~/pd-mapper-git
cd ~/pd-mapper-git

nano PKGBUILD
# fix some errors
makepkg -si


#Compile and Install tqftpserv
git clone https://aur.archlinux.org/tqftpserv-git.git ~/tqftpserv-git
cd ~/tqftpserv-git

nano PKGBUILD
# fix some errors
makepkg -si
sudo systemctl enable tqftpserv pd-mapper
回到root用户
exit
2.2.6.6 添加danctnix源
添加danctnix源 danctnix (arikawa-hi.me)
nano /etc/pacman.conf
找到
[community]
Include = /etc/pacman.d/mirrorlist

[alarm]
Include = /etc/pacman.d/mirrorlist

[aur]
Include = /etc/pacman.d/mirrorlist
下面添加
[danctnix]
Server = https://p64.arikawa-hi.me/$repo/$arch/
然后添加keyring并更新
cd ~
wget https://p64.arikawa-hi.me/danctnix/aarch64/danctnix-keyring-2-1-any.pkg.tar.xz
pacman -U danctnix-keyring-2-1-any.pkg.tar.xz

pacman-key --init
pacman-key --populate danctnix

rm danctnix-keyring-2-1-any.pkg.tar.xz
# clean

pacman -Syy
2.2.6.7 USB 网络
见 USB Networking · dreemurrs-embedded/Pine64-Arch Wiki (github.com)
pacman -Sy danctnix-usb-tethering
systemctl enable usb-tethering.service
这个功能非常有用,例如它可以使你通过usb网络连接ssh进行调试
2.2.6.8 其他软件
中文字体
pacman -S noto-fonts-cjk
# Chinese fonts
yay
su alarm
cd ~
git clone https://aur.archlinux.org/yay-bin.git
cd yay-bin && makepkg -si
exit
桌面环境
自选,建议gnome或phosh
如gnome
pacman -S gnome
systemctl enable gdm
如安装phosh,建议添加danctnix源 danctnix (arikawa-hi.me)
然后安装
网络浏览器
# for example, chromium
pacman -S chromium
2.2.7 有关LTE和一加6T的声音支持
2.2.7.1 修改Modemmanager
重新编译ModemManager,开启plugin_qcom_soc,并安装
su alarm
mkdir ~/modemmanager
cd ~/modemmanager
nano PKGBUILD
将 PKGBUILD - modemmanager (aarch64) | Package Files | Arch Linux ARM 中的内容复制进PKGBUILD
然后进行以下修改
将arch=(x86_64)改为arch=(x86_64 aarch64)
将-D plugin_qcom_soc=disabled一行删除
10c10
< arch=(x86_64)
---
> arch=(x86_64 aarch64)
35d34
<     -D plugin_qcom_soc=disabled
makepkg -rsi
# compile and install

cd ..
sudo rm -rf ~/modemmanager
exit
systemctl enable ModemManager
2.2.7.2 alsa-ucm-conf的配置
在chroot环境中, 将alsa-ucm-conf改为定制版本
Releases · silime/kernel-builder (github.com)
用pacman -U安装此处成品
2.2.7.3 确保tfa98xx模块加载
echo 'snd-soc-tfa98xx' > /etc/modules-load.d/snd-soc-tfa98xx.conf
2.2.7.4 通话音频
详见: postmarketOS / q6voiced · GitLab
安装此处的q6voiced: Release q6voice · silime/kernel-builder (github.com)
pacman -U xxx.pkg.tar.zst
systemctl enable q6voiced
2.2.8 打包
先清理,在chroot环境中
pacman -Scc
# pacman

su alarm # switch to alarm
# clean bash history for alarm
cat /dev/null > ~/.bash_history && history -c && exit

# clean bash history for root
cat /dev/null > ~/.bash_history && history -c
退出chroot环境
exit
解除挂载
cd ~/workspace
sudo umount ~/workspace/arch/run
sudo umount ~/workspace/arch/sys
sudo umount ~/workspace/arch/proc
sudo umount ~/workspace/arch/dev/pts
sudo umount ~/workspace/arch/dev
用tar打包
cd ~/workspace/arch
sudo tar -czvf ~/workspace/arch.tar.gz *
# This will generate arch.tar.gz
3 安装到手机
3.1 刷入twrp和Magisk
解锁、刷TWRP、刷magisk
3.2 分区、格式化分区
连接手机、电脑,手机进twrp
将parted复制到手机储存
电脑输入:
adb shell
然后输入:
cp /sdcard/parted /sbin/ && chmod 755 /sbin/parted
umount /data && umount /sdcard
parted /dev/block/sda
输入p查看当前分区情况
p
对于一加6T,可这样分区:
压缩分区17
resizepart 17
# input 61GB
mkpart esp fat32 61GB 62GB
mkpart arch ext4 62GB 125GB
set 18 esp on
q
# exit parted
再次重启到twrp,格式化各分区
adb shell
mkfs.fat -F32 -s1 /dev/block/by-name/esp
mke2fs -t ext4 /dev/block/by-name/arch
mke2fs -t ext4 /dev/block/by-name/userdata
3.3 获取UUID
重启到Android,在termux或adb shell输入
su
blkid /dev/block/by-name/arch
记下UUID值
3.4 准备grub配置文件
下载grub
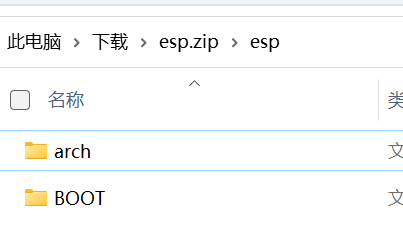
esp.zip (78.5 KB)
boot.tar(1).gz (6.7 MB)
将boot.tar.gz中grub.cfg的uuid全部改为步骤3.3中得到的
替换所有这种字符

3.5 解压rootfs
将arch.tar.gz复制到手机内部存储
建议使用termux操作
pkg update
pkg install tsu

tsu
# root permission needed
cd ~
mkdir arch
mount /dev/block/by-name/arch ~/arch

cd ~/arch
tar -xpvf /sdcard/arch.tar.gz
# extract
3.6 安装grub
tsu

cd ~
mkdir esp

mount /dev/block/by-name/esp esp
mkdir esp/EFI
将esp.zip中这两个文件夹复制到~/esp/EFI/
# /dev/block/by-name/arch has been mounted!
cd ~/arch/boot && ls
将boot.tar.gz内两个文件夹复制进~/arch/boot
3.7 获取、添加dtb
对于一加6T,还需要将这两个dtb复制到~/arch/boot
注:对于一加6(T)不要使用内核编译生成的dtb
见arch/arm64/boot/dts/qcom/sdm845-oneplus-common.dtsi,将不会有显示
对于其它设备,请获取合适的dtb
arch/arm64/boot/dts/qcom/sdm845-oneplus-common.dtsi部分内容(点击展开)
/delete-node/ &rmtfs_mem;

/ {
	aliases {
		serial0 = &uart9;
		hsuart0 = &uart6;
	};

	chosen {
		stdout-path = "serial0:115200n8"; /*line 30 in dtsi*/
	};

	volume-keys {
		compatible = "gpio-keys";
		label = "Volume keys";
		autorepeat;
3.7.1 dtb的获取
下载适用自己设备的postmarketOS的boot.img.xz,解压得到img文件

使用 extract-dtb · PyPI
pip3 install -i https://pypi.tuna.tsinghua.edu.cn/simple extract-dtb
extract-dtb 20220608-1408-postmarketOS-v22.06-phosh-18-oneplus-fajita-boot.img -o .
# use your own img
# will generate something like 01_dtbdump_,OnePlus_6T.dtb

ls
mv 01_dtbdump_,OnePlus_6T.dtb sdm845-oneplus-fajita.dtb
3.7.2 修改dtb,使得可能支持USB otg
提示:似乎会导致USB网络不可用!!
#for Ubuntu 22.04 LTS
sudo apt install device-tree-compiler -y

dtc -I dtb -O dts -o temp.dts xxx.dtb
# e.g. dtc -I dtb -O dts -o temp.dts sdm845-oneplus-fajita.dtb

nano temp.dts
查找dr_mode
找到类似:
                        dwc3@a600000 {
                                compatible = "snps,dwc3";
                                reg = <0x00 0xa600000 0x00 0xcd00>;
                                interrupts = <0x00 0x85 0x04>;
                                iommus = <0x25 0x740 0x00>;
                                snps,dis_u2_susphy_quirk;
                                snps,dis_enblslpm_quirk;
                                phys = <0xb8>;
                                phy-names = "usb2-phy";
                                dr_mode = "peripheral";
                                maximum-speed = "high-speed";
                        };
将peripheral改为host 此时生成的dtb将支持otg,但要外界供电,为了USB主动供电,需要进一步修改,但会导致充电失效
将charger@1000那段删除
                        pmic@2 {
                                compatible = "qcom,pmi8998\0qcom,spmi-pmic";
                                reg = <0x02 0x00>;
                                #address-cells = <0x01>;
                                #size-cells = <0x00>;

                                charger@1000 {
                                        compatible = "qcom,pmi8998-charger";
                                        reg = <0x1000>;
                                        interrupts = <0x02 0x13 0x04 0x03 0x02 0x>
                                        interrupt-names = "usb-plugin\0bat-ov\0wd>
                                        io-channels = <0xdd 0x03 0xdd 0x04>;
                                        io-channel-names = "usbin_i\0usbin_v";
                                        status = "okay";
                                        monitored-battery = <0xde>;
                                };

                                gpios@c000 {
                                        compatible = "qcom,pmi8998-gpio\0qcom,spm>
                                        reg = <0xc000>;
                                        gpio-controller;
                                        gpio-ranges = <0xdf 0x00 0x00 0x0e>;
                                        #gpio-cells = <0x02>;
                                        interrupt-controller;
                                        #interrupt-cells = <0x02>;
                                        phandle = <0xdf>;
                                };
生成新的dtb
dtc -I dts -O dtb -o xxx-host.dtb temp.dts
# e.g. dtc -I dts -O dtb -o sdm845-oneplus-fajita-host.dtb temp.dts
# generate modyfied dtb
复制好dtb,你的usb otg应该就有可能工作

4 刷入UEFI
进入bootloader
对于非a/b
临时启动uefi
fastboot boot boot-xxx.img
刷入到当前boot分区
fastboot flash boot boot-xxx.img
刷入到recovery分区
fastboot flash recovery boot-xxx.img
其他a/b
临时启动uefi
fastboot boot boot-xxx.img
刷入a或b
fastboot flash boot_a boot-xxx.img
或
fastboot flash boot_b boot-xxx.img
可用
fastboot set_active a
或
fastboot set_active b
切换a/b
5 Enjoy!
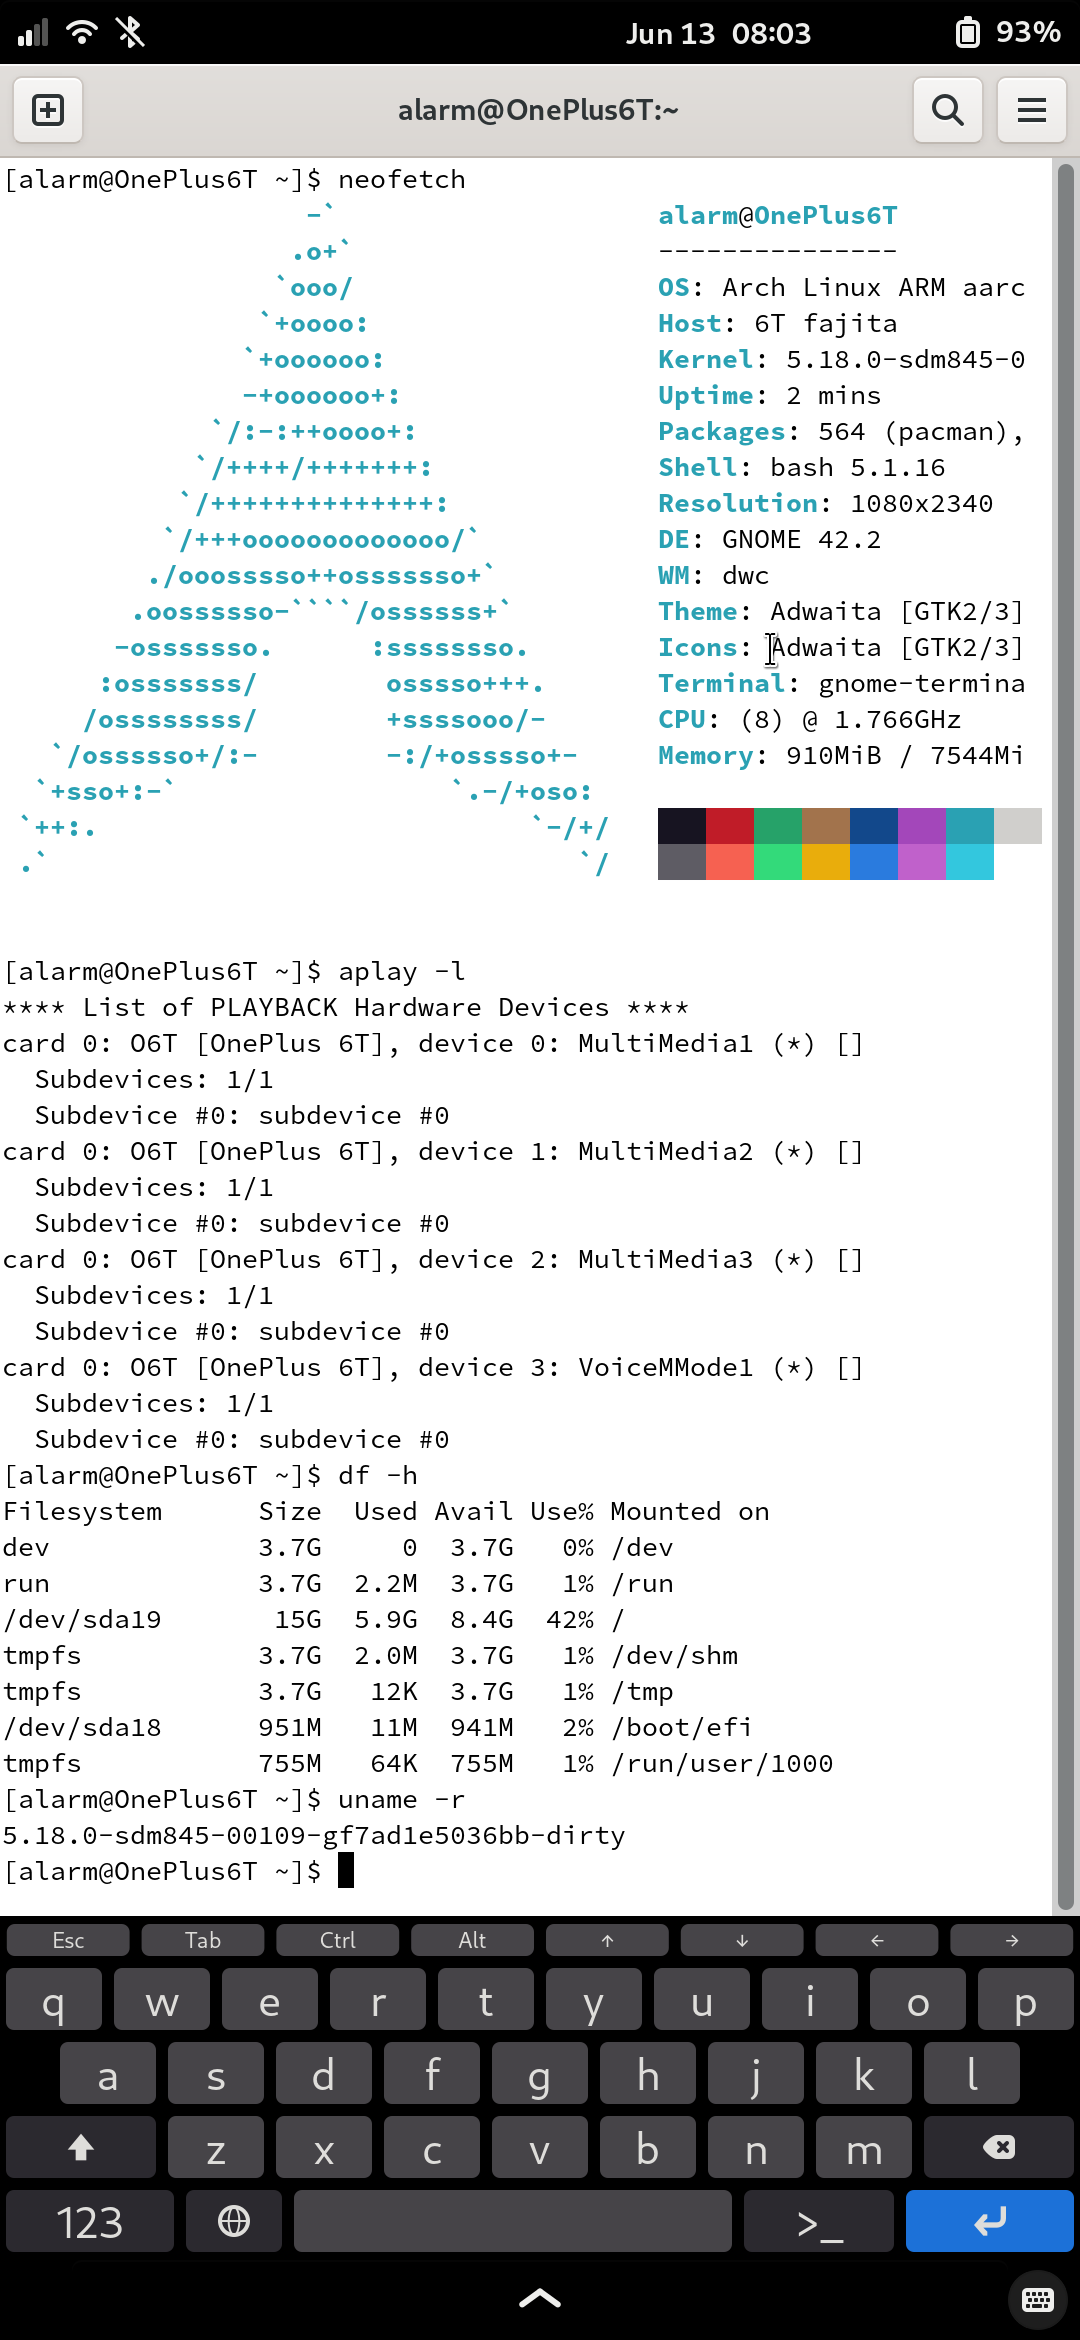
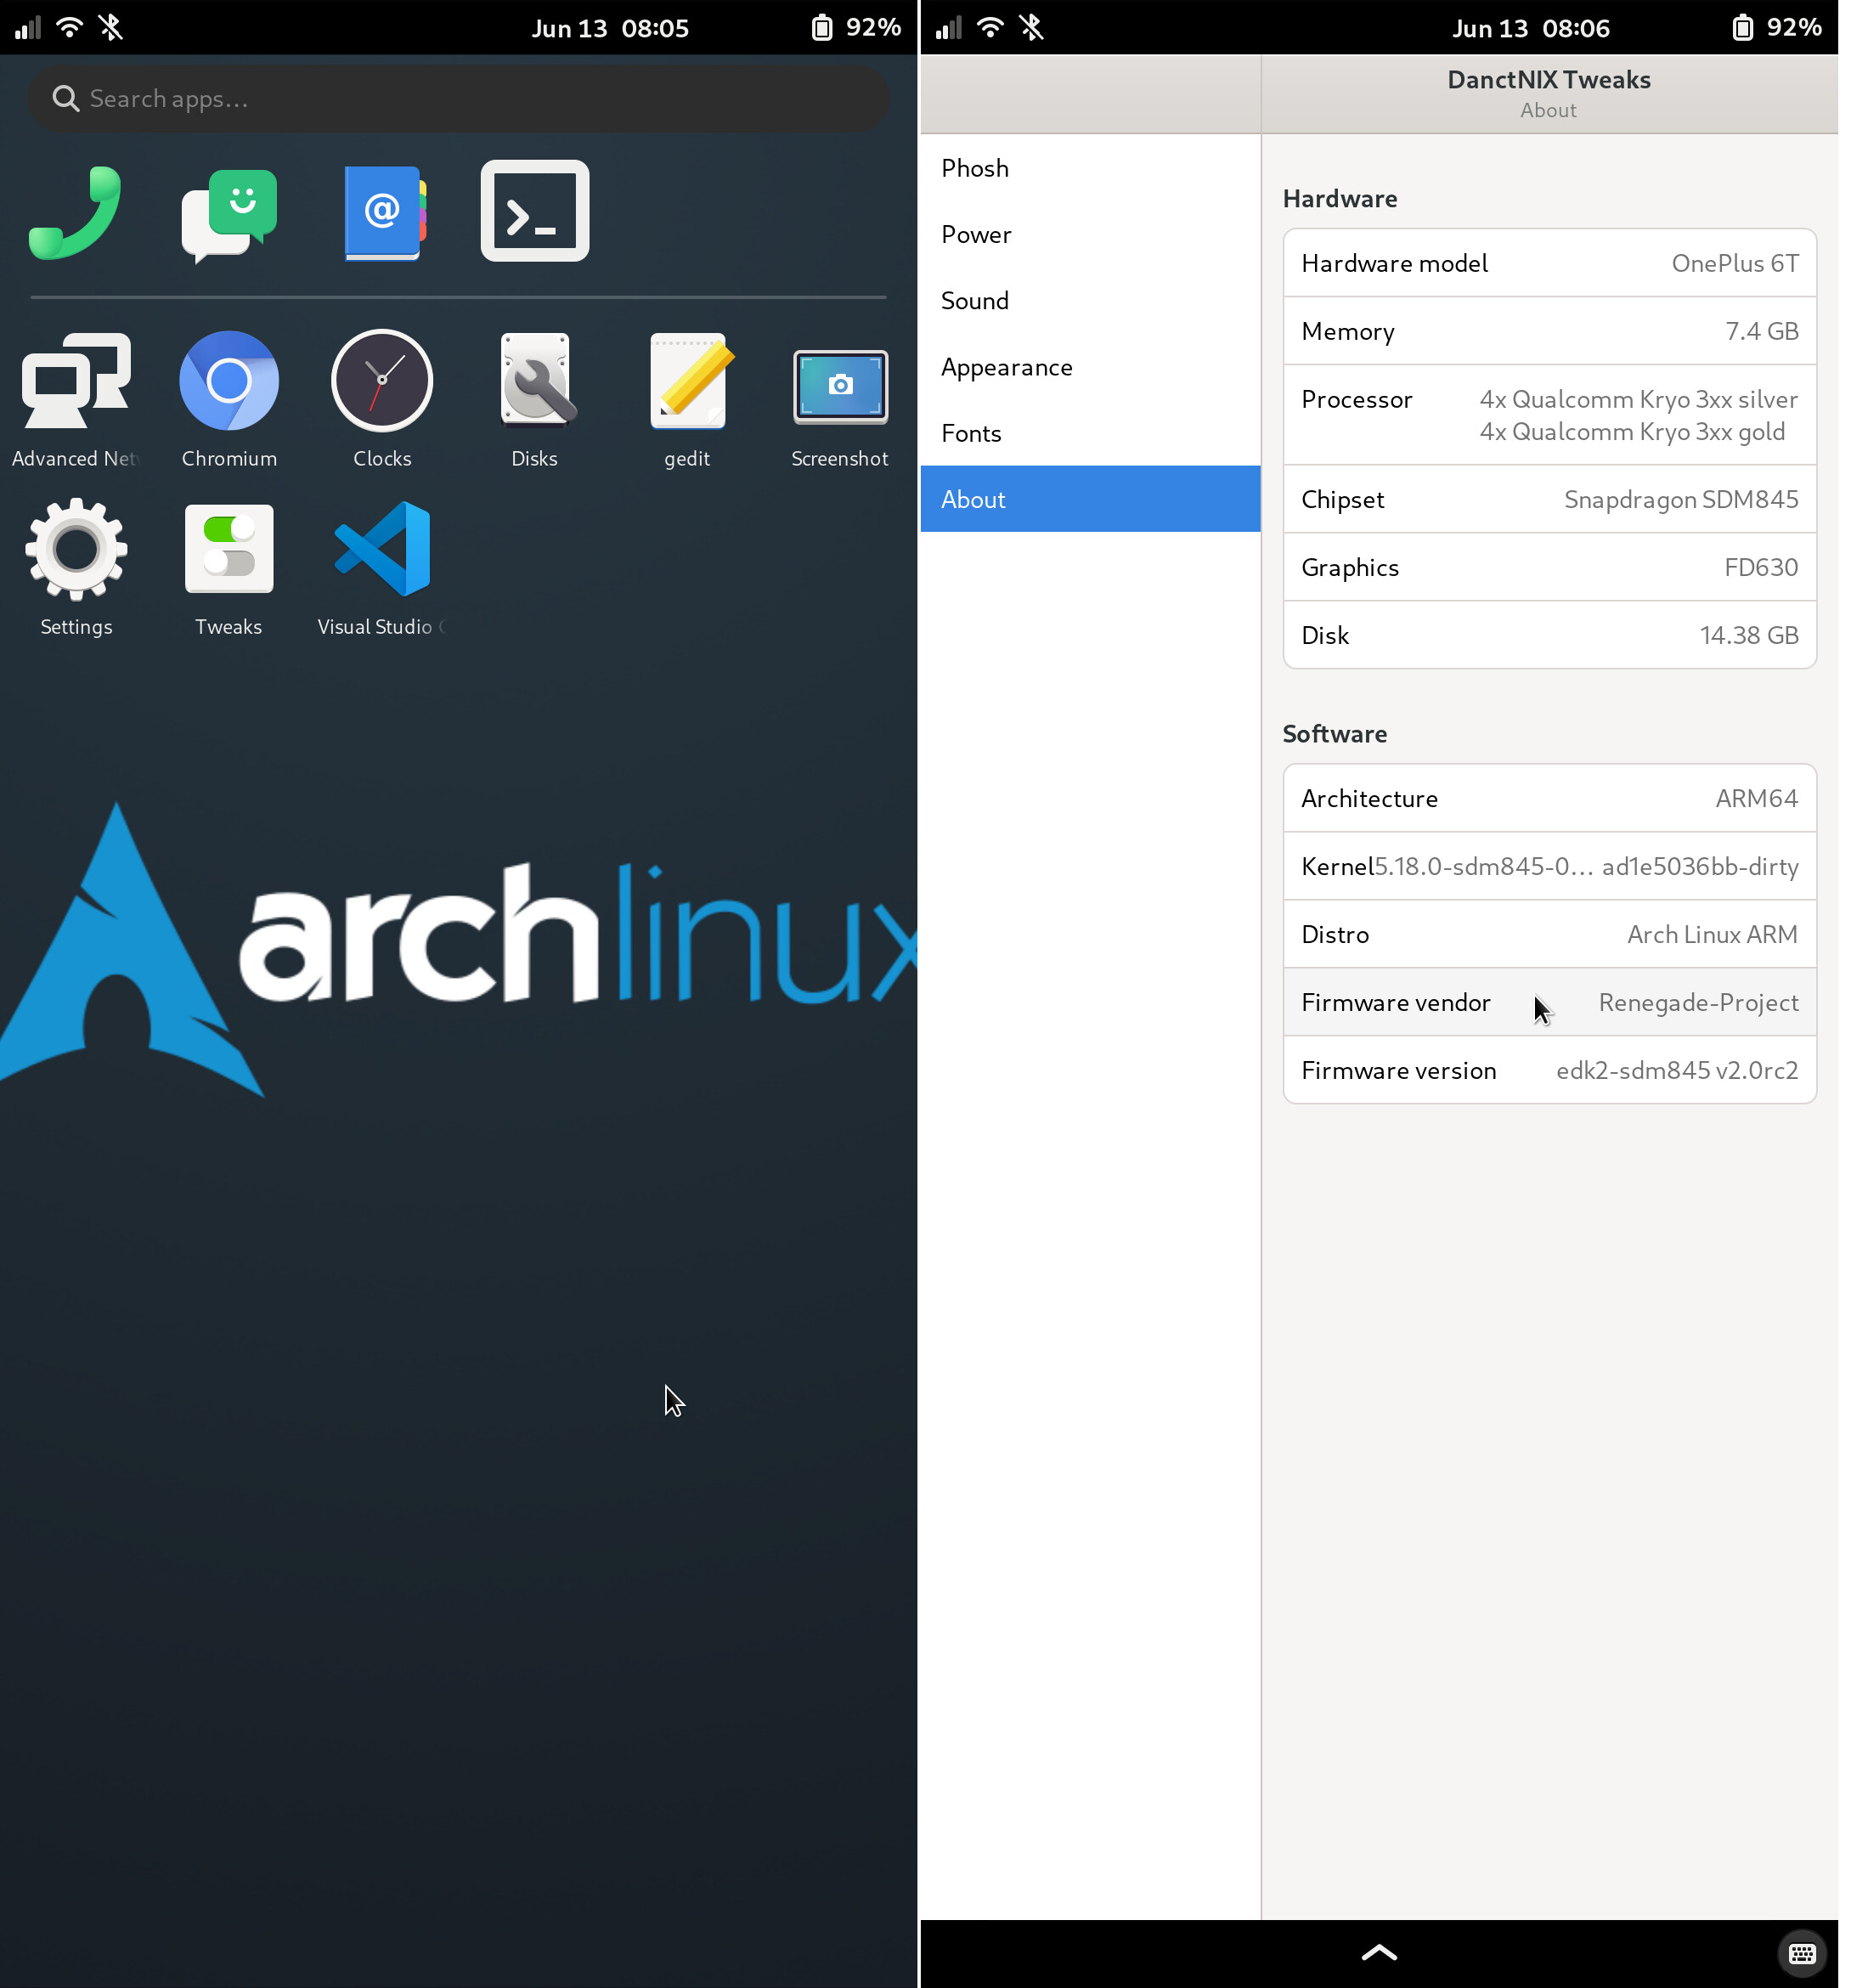
恭喜你!你已经成功在你的手机上安装Archlinux!!希望你能有所收获!! ![]()
![]()
![]()
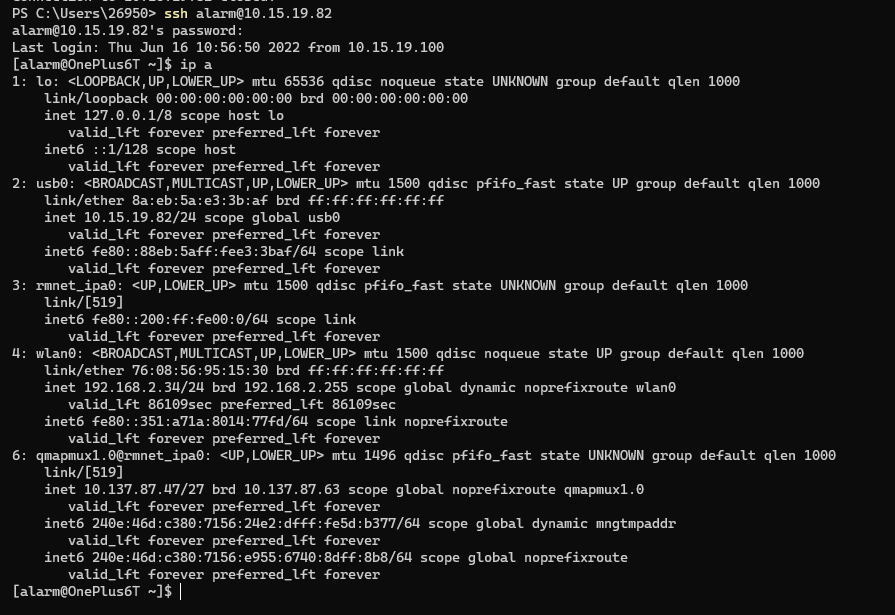
5.1 通过USB网络连接ssh
非常有用的功能,比如你发现无法使用WiFi(比如你忘记安装qrtr/rmtfs一类软件包),这将成为一个很好补救措施
将手机插入电脑,在电脑命令行输入
ssh alarm@10.15.19.82
# ssh allows you to control your phone!
5.2 coremark跑分
yay -S coremark-git
coremark

5.3 unixbench 跑分
========================================================================
BYTE UNIX Benchmarks (Version 5.1.3)
System: : GNU/Linux
OS: GNU/Linux -- 5.18.0-sdm845-00109-gf7ad1e5036bb-dirty -- #1 SMP PREEMPT Thu Jun 2 01:12:20 UTC 2022
Machine: aarch64 (unknown)
Language: en_US.utf8 (charmap="UTF-8", collate="UTF-8")
CPU 0: (38.4 bogomips)
CPU 1: (38.4 bogomips)
CPU 2: (38.4 bogomips)
CPU 3: (38.4 bogomips)
CPU 4: (38.4 bogomips)
CPU 5: (38.4 bogomips)
CPU 6: (38.4 bogomips)
CPU 7: (38.4 bogomips)
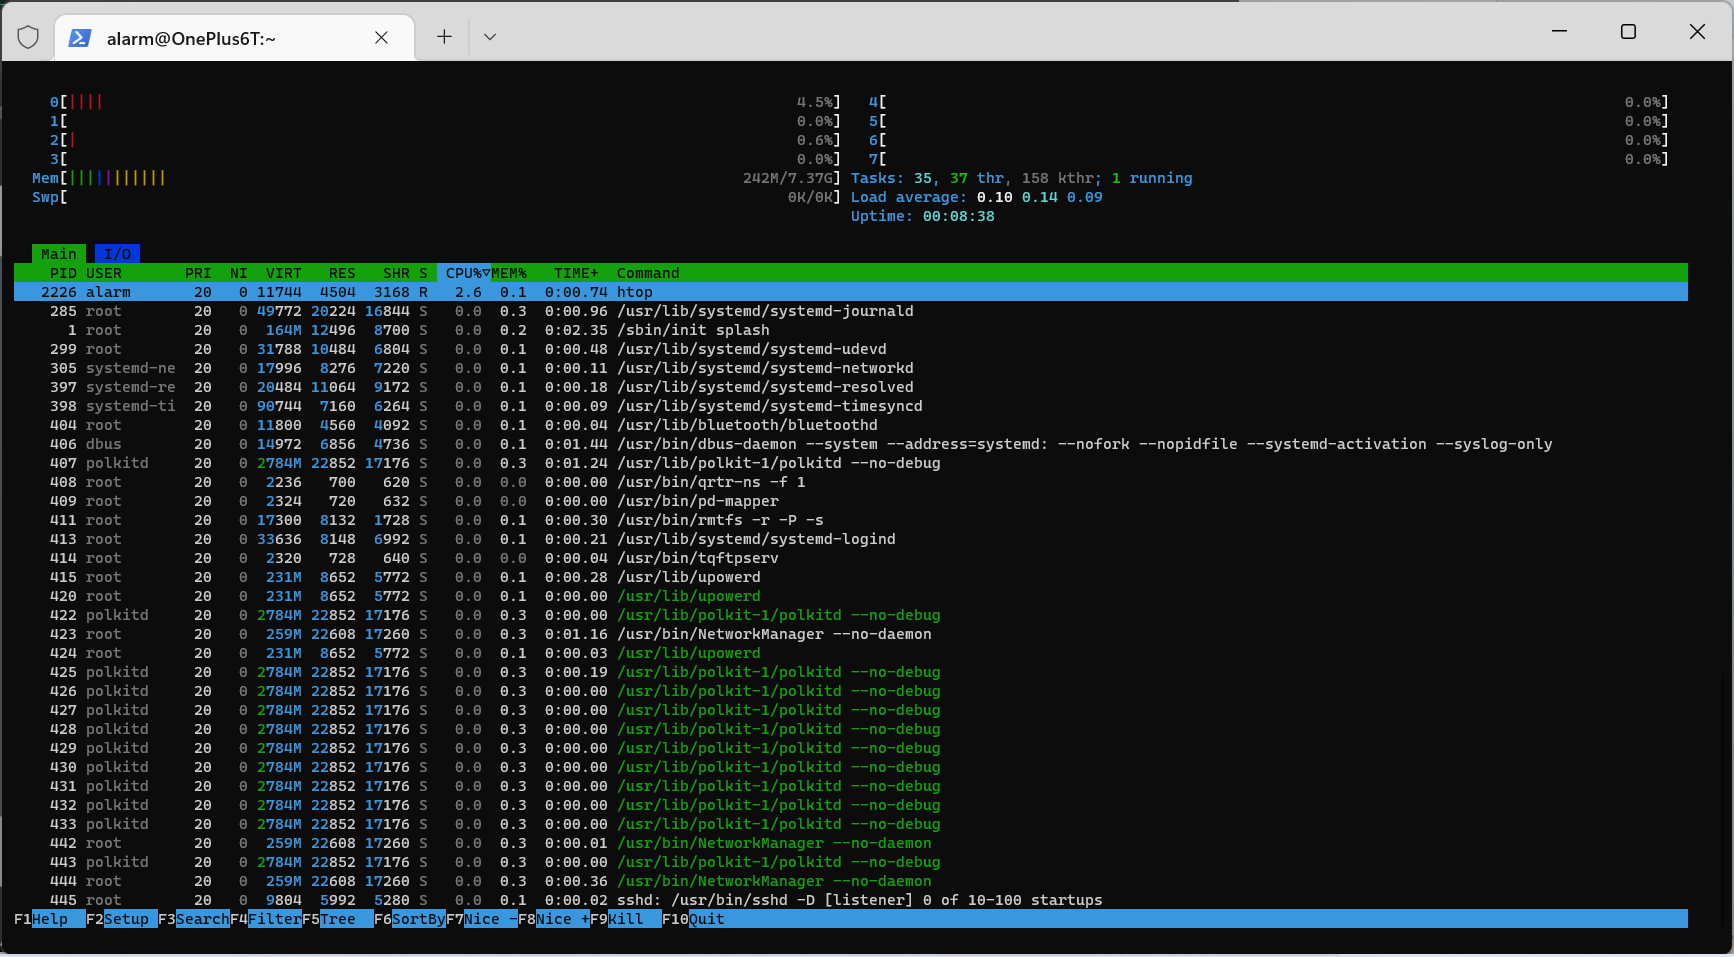
08:08:45 up 4 min, 3 users, load average: 0.23, 0.15, 0.07; runlevel
------------------------------------------------------------------------
Benchmark Run: Wed Jun 15 2022 08:08:45 - 08:36:48
8 CPUs in system; running 1 parallel copy of tests
Dhrystone 2 using register variables 31371686.9 lps (10.0 s, 7 samples)
Double-Precision Whetstone 6636.9 MWIPS (9.9 s, 7 samples)
Execl Throughput 3464.7 lps (30.0 s, 2 samples)
File Copy 1024 bufsize 2000 maxblocks 431850.5 KBps (30.0 s, 2 samples)
File Copy 256 bufsize 500 maxblocks 212468.6 KBps (30.0 s, 2 samples)
File Copy 4096 bufsize 8000 maxblocks 1100792.9 KBps (30.0 s, 2 samples)
Pipe Throughput 1189114.2 lps (10.0 s, 7 samples)
Pipe-based Context Switching 16156.4 lps (10.0 s, 7 samples)
Process Creation 1880.5 lps (30.0 s, 2 samples)
Shell Scripts (1 concurrent) 1267.7 lpm (60.0 s, 2 samples)
Shell Scripts (8 concurrent) 928.5 lpm (60.0 s, 2 samples)
System Call Overhead 904143.8 lps (10.0 s, 7 samples)
System Benchmarks Index Values BASELINE RESULT INDEX
Dhrystone 2 using register variables 116700.0 31371686.9 2688.2
Double-Precision Whetstone 55.0 6636.9 1206.7
Execl Throughput 43.0 3464.7 805.7
File Copy 1024 bufsize 2000 maxblocks 3960.0 431850.5 1090.5
File Copy 256 bufsize 500 maxblocks 1655.0 212468.6 1283.8
File Copy 4096 bufsize 8000 maxblocks 5800.0 1100792.9 1897.9
Pipe Throughput 12440.0 1189114.2 955.9
Pipe-based Context Switching 4000.0 16156.4 40.4
Process Creation 126.0 1880.5 149.2
Shell Scripts (1 concurrent) 42.4 1267.7 299.0
Shell Scripts (8 concurrent) 6.0 928.5 1547.5
System Call Overhead 15000.0 904143.8 602.8
========
System Benchmarks Index Score 687.6
------------------------------------------------------------------------
Benchmark Run: Wed Jun 15 2022 08:36:48 - 09:05:10
8 CPUs in system; running 8 parallel copies of tests
Dhrystone 2 using register variables 157010560.9 lps (10.0 s, 7 samples)
Double-Precision Whetstone 38380.8 MWIPS (9.5 s, 7 samples)
Execl Throughput 14684.0 lps (29.9 s, 2 samples)
File Copy 1024 bufsize 2000 maxblocks 775566.4 KBps (30.0 s, 2 samples)
File Copy 256 bufsize 500 maxblocks 247697.5 KBps (30.0 s, 2 samples)
File Copy 4096 bufsize 8000 maxblocks 1947686.0 KBps (30.0 s, 2 samples)
Pipe Throughput 6462292.1 lps (10.0 s, 7 samples)
Pipe-based Context Switching 535021.4 lps (10.0 s, 7 samples)
Process Creation 21863.7 lps (30.0 s, 2 samples)
Shell Scripts (1 concurrent) 12727.2 lpm (60.0 s, 2 samples)
Shell Scripts (8 concurrent) 1865.6 lpm (60.1 s, 2 samples)
System Call Overhead 4647127.5 lps (10.0 s, 7 samples)
System Benchmarks Index Values BASELINE RESULT INDEX
Dhrystone 2 using register variables 116700.0 157010560.9 13454.2
Double-Precision Whetstone 55.0 38380.8 6978.3
Execl Throughput 43.0 14684.0 3414.9
File Copy 1024 bufsize 2000 maxblocks 3960.0 775566.4 1958.5
File Copy 256 bufsize 500 maxblocks 1655.0 247697.5 1496.7
File Copy 4096 bufsize 8000 maxblocks 5800.0 1947686.0 3358.1
Pipe Throughput 12440.0 6462292.1 5194.8
Pipe-based Context Switching 4000.0 535021.4 1337.6
Process Creation 126.0 21863.7 1735.2
Shell Scripts (1 concurrent) 42.4 12727.2 3001.7
Shell Scripts (8 concurrent) 6.0 1865.6 3109.4
System Call Overhead 15000.0 4647127.5 3098.1
========
System Benchmarks Index Score 3187.6
[alarm@OnePlus6T UnixBench]$
6 可能需要的修复/调整
6.1 修复sdm845关机crashdump
如果关机可能会出现crashdump
特别感谢 @skr-niao 大佬
sudo nano /etc/systemd/system/shutdown-modem.service
填入
[Unit]
Description=Poweroff modem remoteproc to prevent wlan fw crash
DefaultDependencies=no
Before=shutdown.target

[Service]
Type=oneshot
# remoteproc2 is always the modem on SDM845
ExecStart=echo stop | tee /sys/class/remoteproc/remoteproc*/state

[Install]
WantedBy=shutdown.target
启用服务
sudo systemctl enable shutdown-modem.service

# sudo systemctl start shutdown-modem.service
它会在关机前关闭modem remoteproc
7 see also
7.1 MSM8998:
https://wiki.postmarketos.org/wiki/Qualcomm_Snapdragon_835_(MSM8998)
7.2 sdm845
https://wiki.postmarketos.org/wiki/SDM845_Mainlining
7.3 SM8150
https://wiki.postmarketos.org/wiki/Qualcomm_Snapdragon_855_(SM8150)
Special Thanks to @moderators @admins